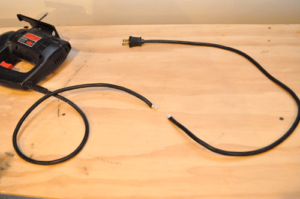
Contractors can be brutally tough on their tools, and given enough time, it’s not uncommon for a power tool cord to get nicked, damaged or even completely severed. Some manufacturers have responded with removable power cords that are easy to replace, and those have been met with mixed reviews. However, fixing a broken cord isn’t difficult, and it’s cheaper than buying a new one. Today’s article is going to show you how to repair a broken power cord, and I sacrificed an old SKIL jigsaw for this demonstration. After I’m finished it’ll look just as good as before, albeit a little shorter.
Materials
Before I get started, here’s a list of materials you’ll need:
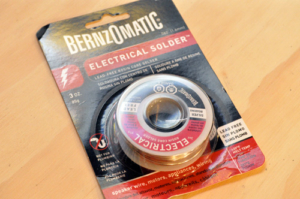
- Electrical solder (not pipe solder)
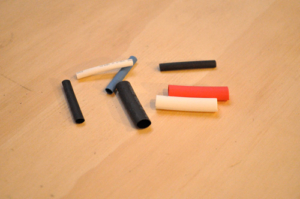
- Heat shrink tubing
- Electrical Tape
Tools
- Soldering iron
- Cutting pliers
- Utility knife
- Wire strippers
- Heat gun (or hair dryer)
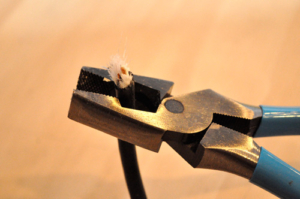
Step 1: Trim Ends
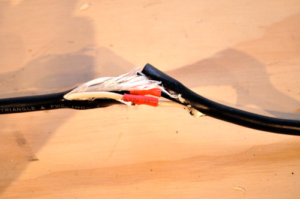
You can see my miter saw made short work of this power cord leaving jagged and frayed edges.
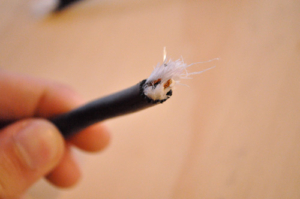
I trimmed both ends with cutting pliers.
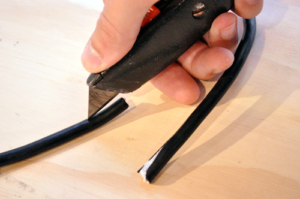
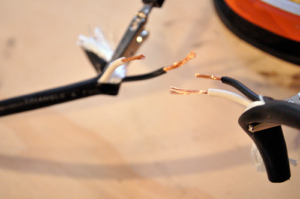
Step 2: Cut Outer Sheathing
Next, I used a utility knife to slice the outer sheathing much like cutting Romex. I made a lengthwise cut about 2″ long, and peeled back the sheathing.
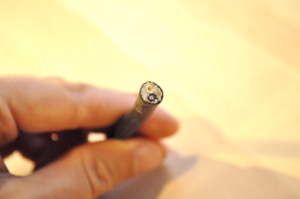
Step 3: Strip Wires
I separated out the black and white wires, and used wire strippers to remove a short length of insulation. Odds are that your power cord is composed of stranded copper (like mine) so be careful not to cut any of the strands.

At this point I set both ends into the alligator clips on my soldering iron station.
Step 4: Twist and Solder
Before connecting the wires, I slipped a heat shrink tube in place. Heat shrink tubes will only constrict so far so select a tube that is just big enough to fit over the finished joint.
I paired the black wires and white wires, and wrapped them in-line with the rest of the cord. I used the soldering iron to heat the splice, and when it was hot enough, applied the solder. A good soldering iron (not like the one I used) will be able to heat the splice quickly and melt the solder without too much trouble. The solder I used melts at 430° F so make sure your soldering iron can get hot enough.
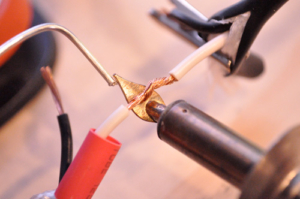
I tried to make a nice, smooth connection with plenty of solder holding the wires together. Next, I repeated this process for the second pair of wires.
Soldering irons get really hot so be careful not to burn yourself or the wire insulation. If you make a mistake, trim the ends and start over.
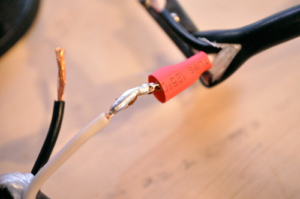
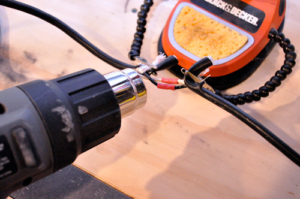
Step 5: Heat Shrink Tube
When the soldering was finished and the splices had cooled, I slid the heat shrink tubes in place, and applied low heat with a heat gun until the tubes were tight.
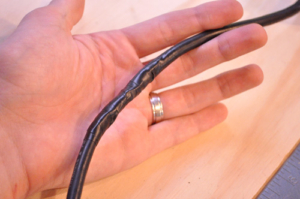
Step 6: Wrap in Tape
Lastly, I cut back any overlapping sheathing and removed some of the filler string. Then I wrapped everything with a couple of layers of electrical tape.
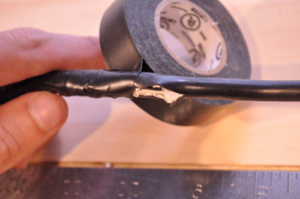
In the end, my SKIL jigsaw worked just like before. The cord is completely repaired, and you almost can tell it was ever damaged.